Unleashing the Power of AI with Cloud GPUs: A Step-By-Step Guide
Today, we dive into the heart of the exciting realm of AI and machine learning, more specifically, how to run any model of your choice using cloud GPUs, even the gigantic ones like Wakano 65B. Yes, that’s right, and the good news is, it’s not as daunting as it sounds.
The Benefits of Using Cloud GPUs
Many of us don't have the luxury of high-end GPUs on our local machines. Such GPUs can cost a small fortune and may be difficult to procure. However, we can circumvent these challenges by renting cloud GPUs by the hour from cloud GPU services. These services provide a straightforward, one-click setup environment, allowing us to run even the most extensive models with ease.
In this guide, we'll be using a service called RunPod. The process is simple: sign up for a new account at runpod.io. You'll then be directed to a page that lists various GPUs available for rent, each with its own price. RunPod offers a range of options, from the RTX 6000 to the RTX 4090, and even the A6000.
Setting Up Your Cloud GPU
Once you've signed up and chosen your GPU, you'll need to enter your credit card information. Remember, this is a paid service, but the costs are modest – typically a dollar or less per hour. You'll then deposit some money into your account.
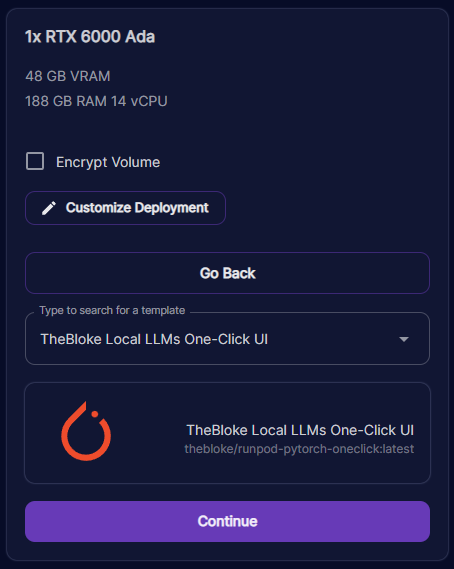
The next step is choosing your GPU. Even the most basic option comes with a generous 24 gigabytes of VRAM and 83 gigabytes of RAM, so you can't go wrong. Just compare the model size to what you can fit in the VRAM. For our purposes, let's go with the RTX 6000 Ada.
Click on the 'Predeployment' button, and then 'Deploy'. Here you can select a template, which is essentially a pre-configuration of the GPU server. RunPod provides several options, including their own default template for text generation. Alternatively, you can use the template provided by the prolific AI modeler known as 'The Bloke'. His template comes equipped with everything you need to run a host of models.
Once you've selected a template, hit 'Continue', and then 'Deploy'. Now, wait a few seconds while your pod is prepared.
Running Your Model
You'll next land on a screen labeled 'My Pods'. From here, click on the 'Connect' button and choose the 'Connect via HTTP port 7860' option.
This will open up a new window for you to input and receive output from your model. However, before that, navigate to the 'Model' tab and select 'Download Custom Model'. Here, you can input the name of any model you want, and it will download for you. This includes colossal models like the Guanaco 65 billion parameter GPTQ version. After downloading, refresh the page and load your model.
At this point, you may encounter some errors, often due to additional settings that need to be adjusted for the model. These can usually be found on the Hugging Face model page. After making the necessary adjustments, hit 'Save settings for this model' and 'Reload the model'.
Text Generation
Once your model has loaded successfully, navigate to the 'Text Generation' tab. This is where you can experiment with various prompt templates and generate text. After entering your desired prompt, click 'Generate' and observe the output.
You have a range of options and parameters at your disposal, including temperature, top P, and top K. Experiment with these settings to find what works best for you.